Tailwind is the best Pinterest Marketing tool. But why do people use it?
Tailwind is a partner with Pinterest and their main goals are to save you time (by automating your pins) and help you grow your Pinterest account (by constant pinning and Tailwind Tribes).
How Does Tailwind Work?
In order to get started on the platform, you will need to have an active Pinterest account.
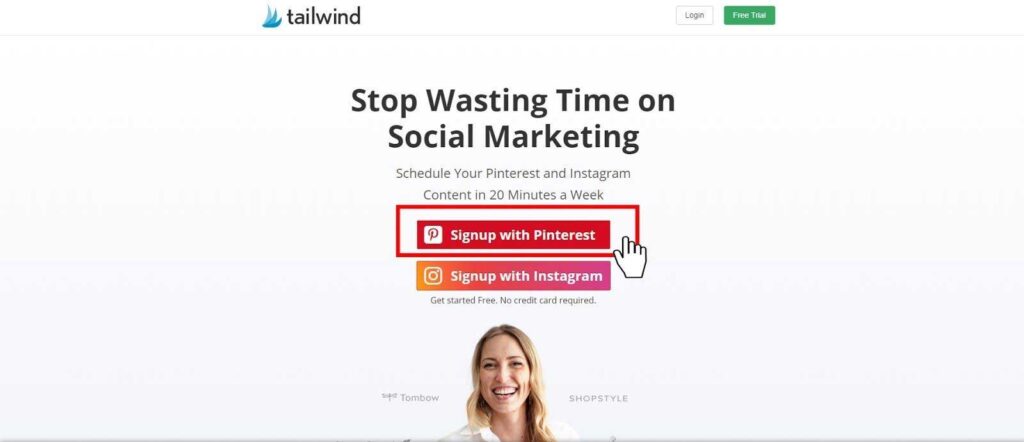
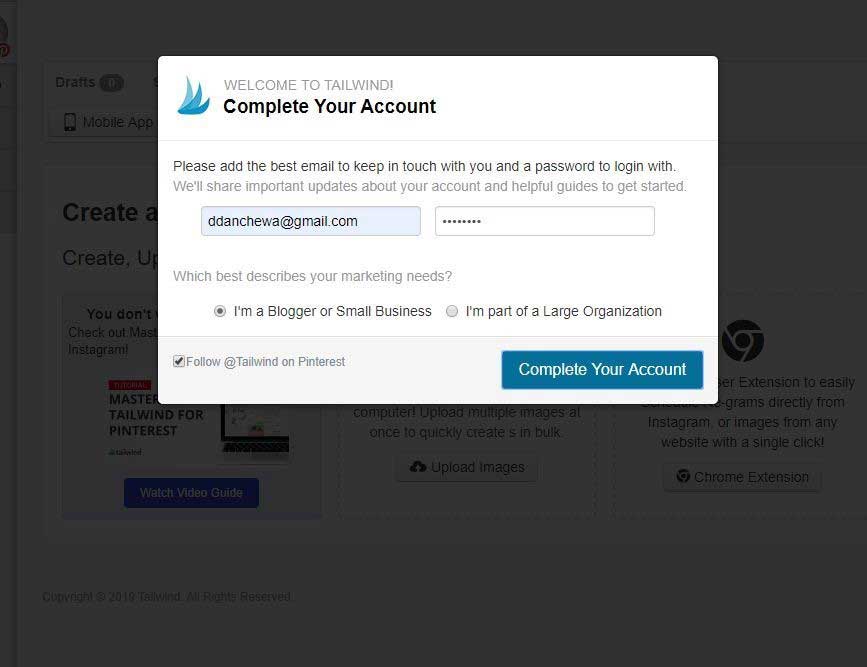
All you need to do is Sign up with your Pinterest credentials and you will be able to log in. Your next step would be to add an email and a password for your Tailwind account as shown below.
The next step is to install the Tailwind extension to your browser. Here you can find the extension for the most popular browsers – Google Chrome extension, Mozilla Firefox, and Safari.
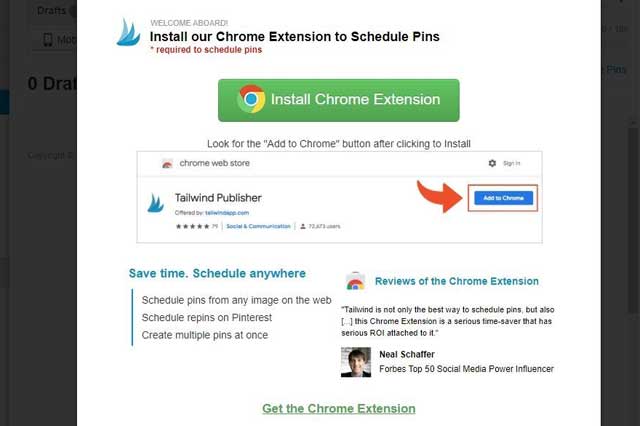
It is important to add the Tailwind extension to your browser. That way, you can save pins to Tailwind, from any website or save in bulk on Pinterest (more on that later).
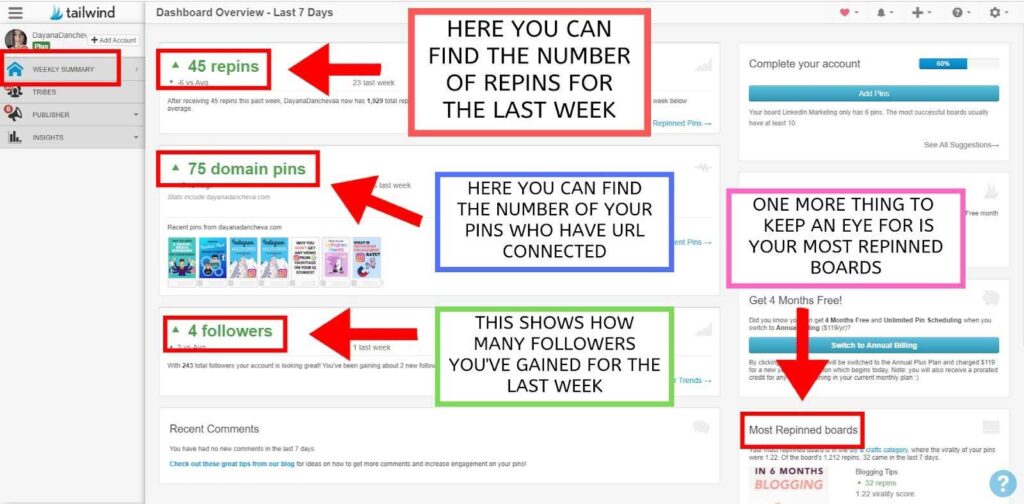
Once you are done, you will go to the Dashboard / Your Weekly Summary. Here, you can find very helpful information about your Pinterest account for the last 7 days. You can see repins, your own pins who have URL (also called domain pins), followers gained and your most repined boards.
After Weekly Summary, you can find Tribes, but I will go over them with more details when I cover Tailwind-Pinterest strategies.
Before I continue with the rest of Tailwind, I would like to introduce you to the process of scheduling pins. As I’ve mentioned before, if you have the Tailwind extension, you can save 1 or many pictures from any website.
How To Save Only One Picture With Tailwind Extension?
Let’s use this article on Medium as an example, where you want to save the picture and turn it into a pin with a reference to this article.
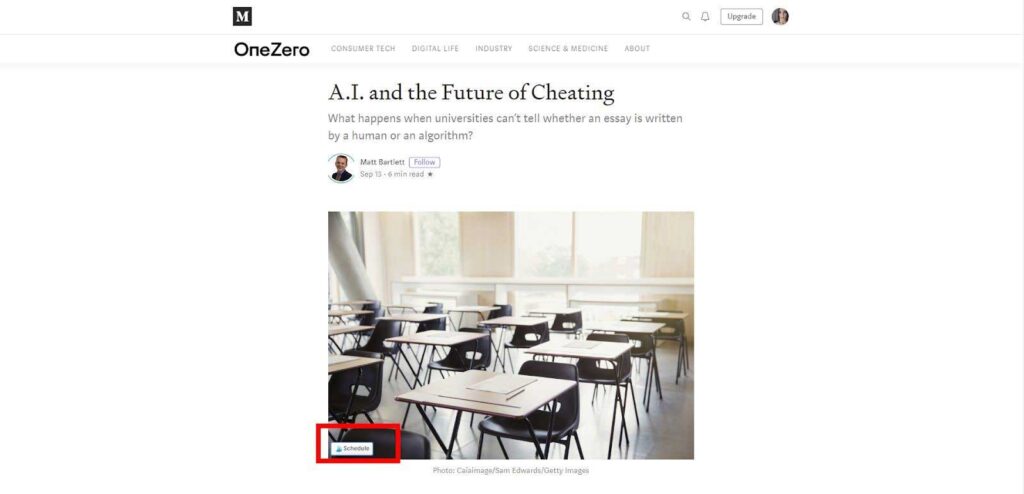
When you move your mouse to the picture, in the lower-left corner, you will be able to see the Tailwind “Schedule” button. Once you press this button, you will get a new window – the Tailwind scheduling tool. It will look like this:
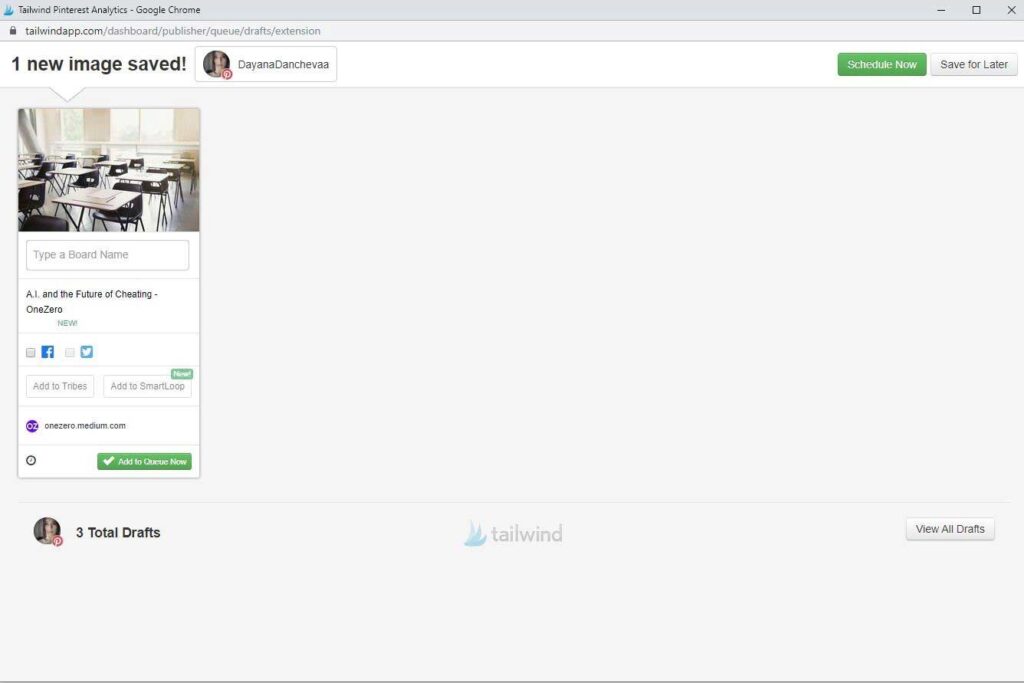
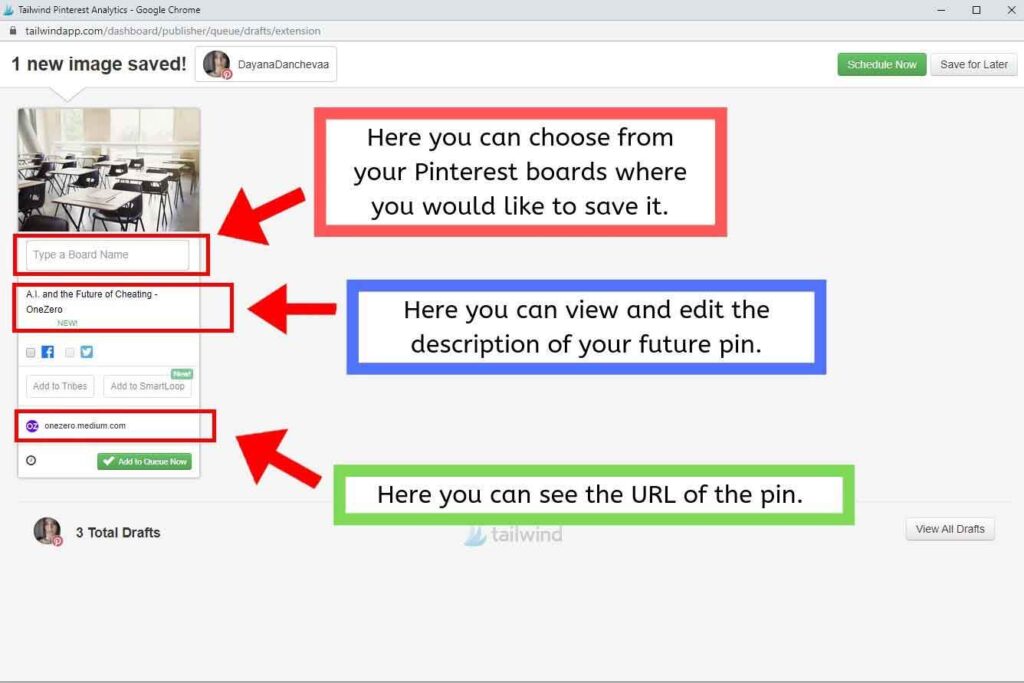
There, you can find the image, description of the article and the source URL. You can also select where you want to save it on Pinterest.
In addition, you can specify when you want to post this pin. You can add it to the Queue of pins on Tailwind (which I am going to explain soon), Save it for Later or Schedule it now.
How To Save Multiple Photos With Tailwind Extension?
Let’s use the same article but instead of one picture, this time we will try to get all the available picture and add a few of them to the Tailwind system. To do that, you will need to find the Tailwind extension in your browser.
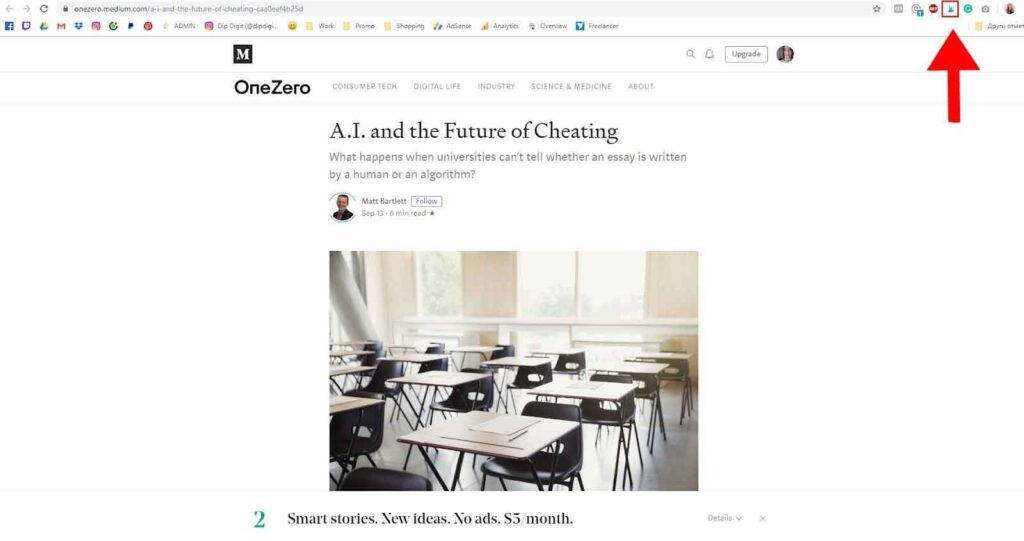
When you click on the Tailwind extension icon, you will get all the images available on the page. It will look like this:
You can then select the images you want to add to the Tailwind system. They will have the same URL as they are from the same article, but Pinterest is very dependent on visuals and testing, so that’s a great way to share the same article multiple times with different images.
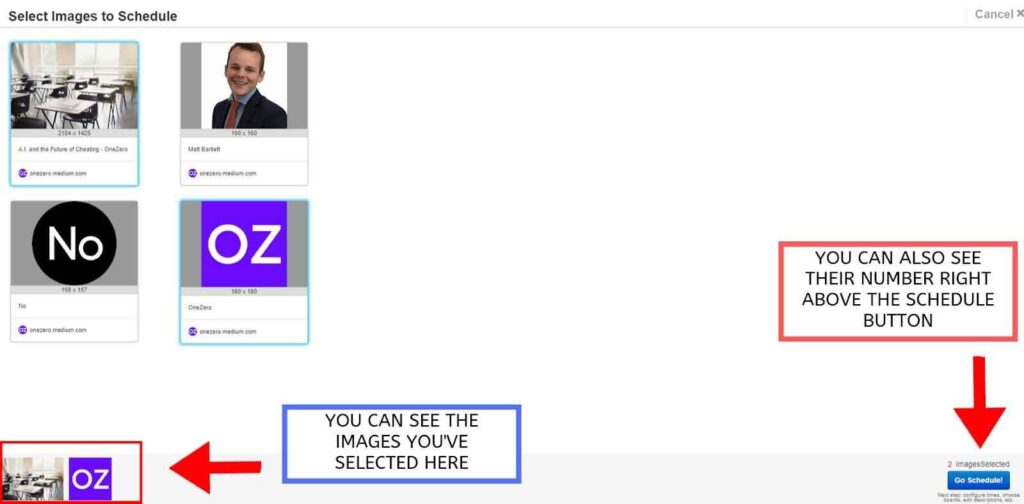
I have selected the first and the last picture of this article and they are now marked in blue. You can also find the images you’ve selected in the lower-left corner. When you are satisfied with your selections, you can press the Go Schedule button, which will get you back to the Tailwind scheduling tool:
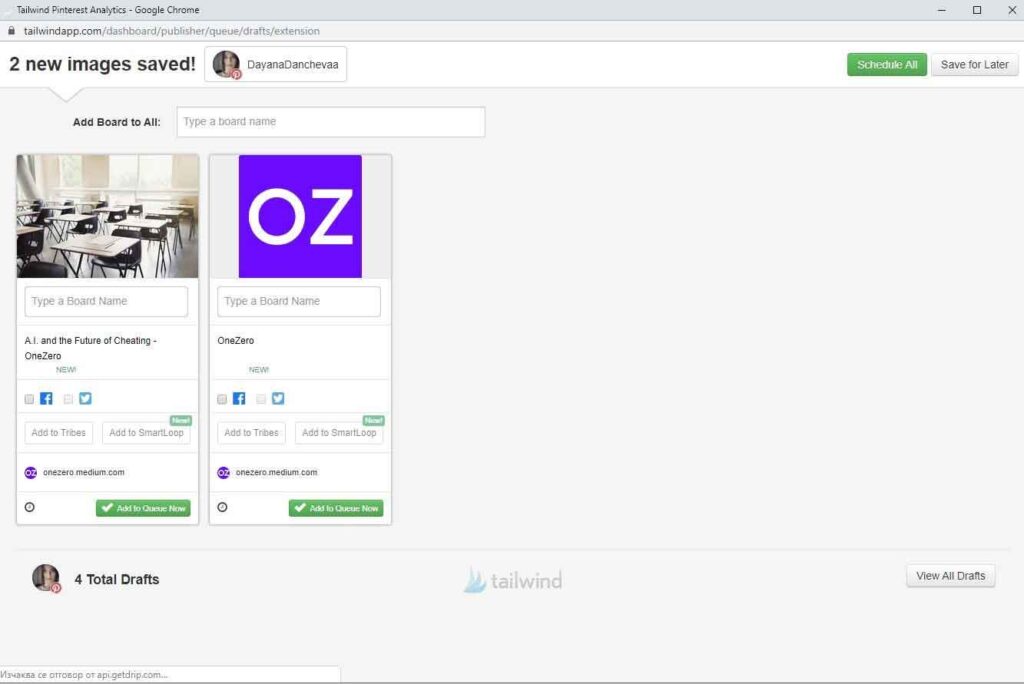
Like the process with one photo, you will have the option to choose from your Pinterest boards for each image, edit the description and see the source URL. You can exit the window and if you don’t schedule or add your pins to the queue, they will be saved in Drafts.
Now let’s get back to Tailwind. When you go on the website, under Weekly Summary and Tribes, you will find Publisher. There you can find everything related to your Pinterest scheduling. Let’s start with Drafts.
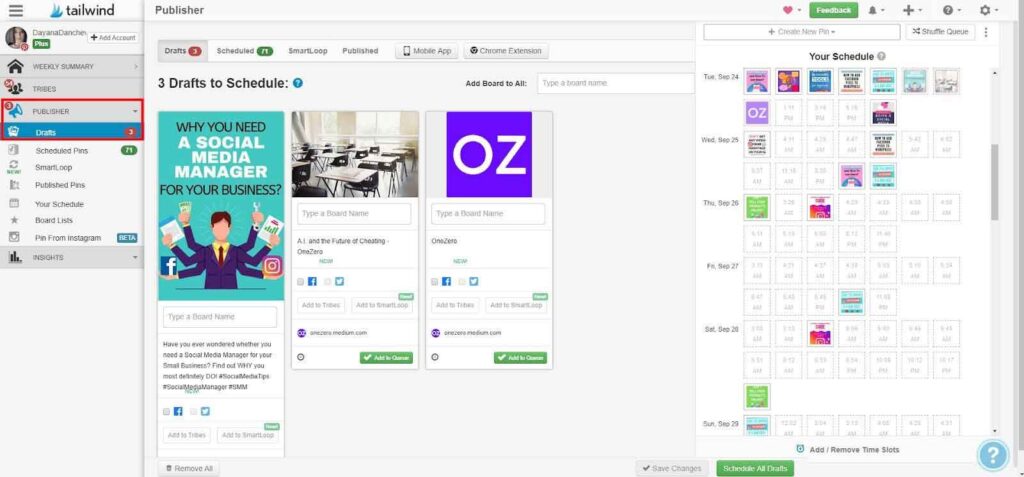
You can see that I have 3 drafts now, two of which are the ones I have just saved from the article on Medium. Drafts are great if you want to have more control over your pinning schedule.
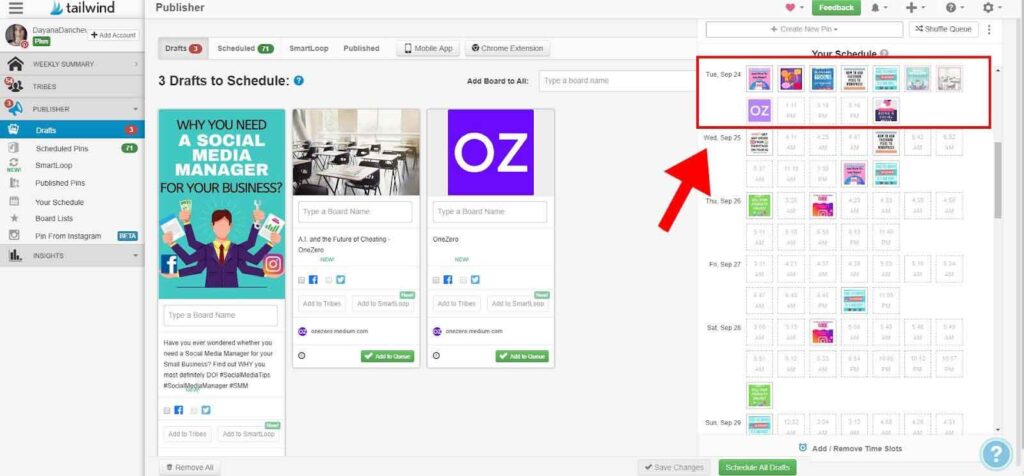
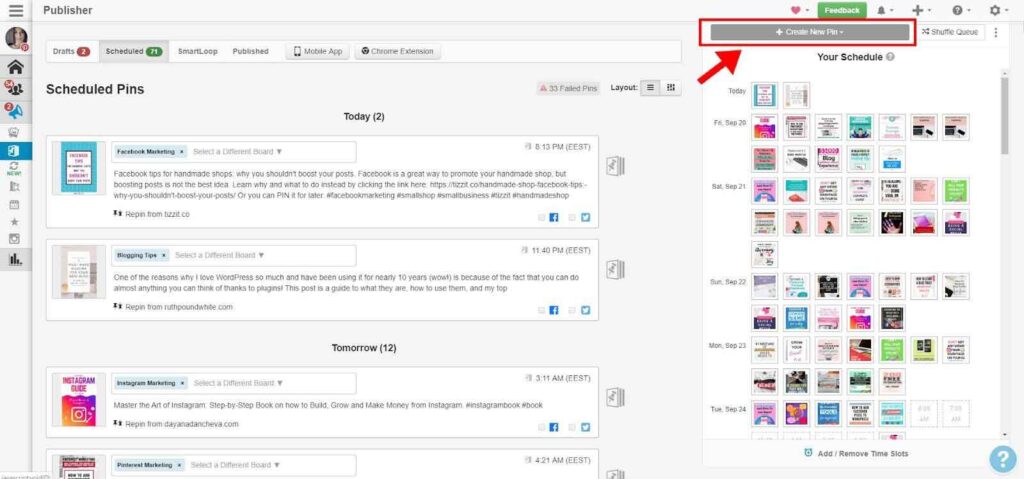
If you don’t use the draft option, when you add the pictures you want to the Tailwind software and you select Schedule all or Add to Queue Now (see the picture below for reference), the new pins that you just saved will take the first available spots on your Tailwind calendar schedule:
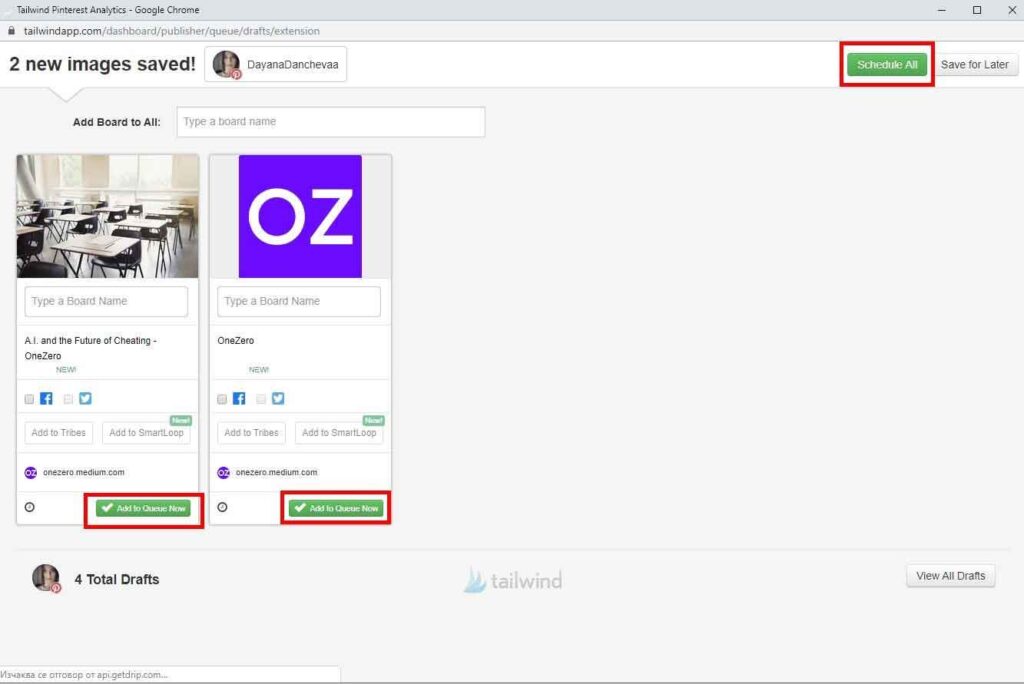
The difference between Schedule all and Add to Queue Now is that Add to Queue Now will add only the specific image you’ve selected whereas Schedule all will simplify your work and add all of them to your Tailwind schedule.
In my case, (see the picture below), the first pin will be scheduled on September 24, which is the first available time slot and continue with the rest. This will happen only if you have scheduled the images by adding them to the queue or by scheduling them all.
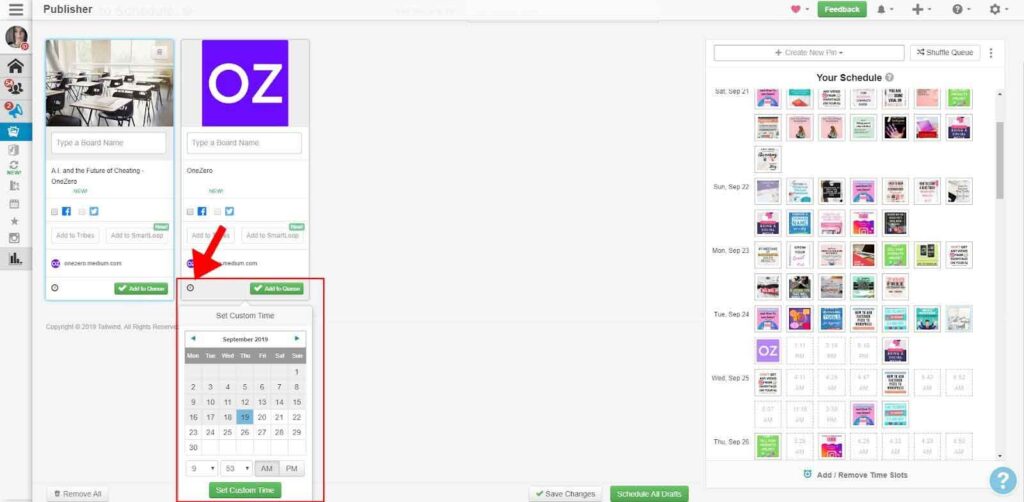
If they are in Drafts, you can still add them to the queue which means that they will also take the first available spot, or you can set a custom time. To do that, you will have to click on the clock which you can find under each one of your pins in Drafts:
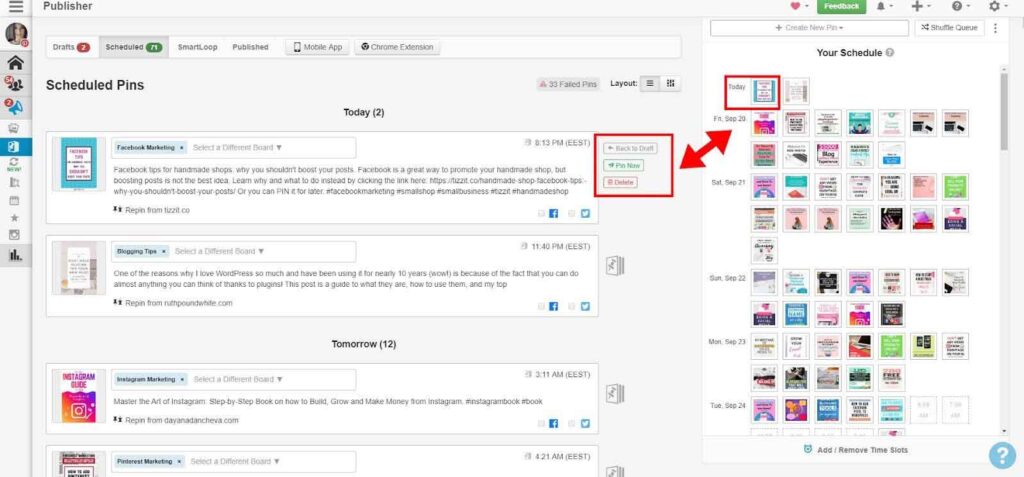
You can find your scheduled pins under Drafts.
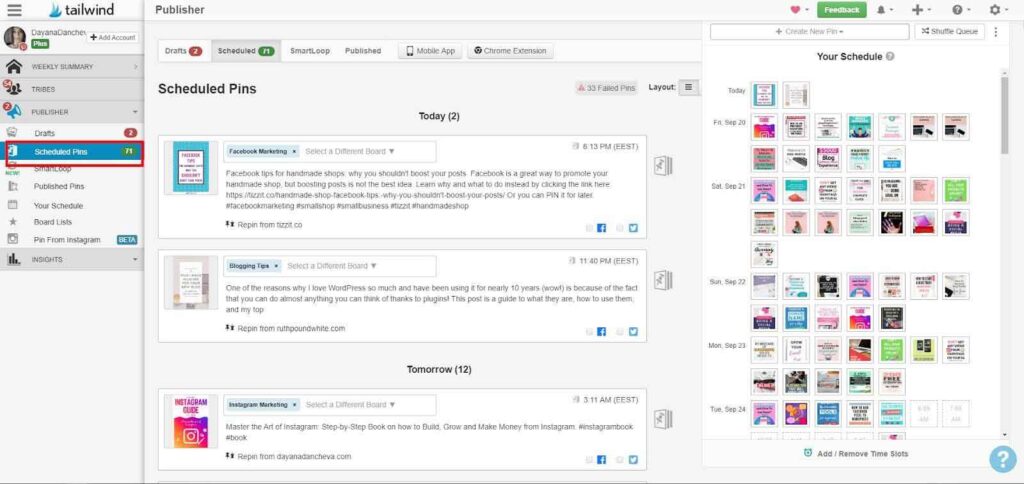
There you can change the status of your scheduled pins. You can send them back to being drafts, pin them now or simply delete them. You can also add them to your Facebook and Twitter accounts.
You can also create new pins within the Tailwind platform by uploading your own image. And then, you can find your uploaded image in Drafts, where you can choose a board, add description and source URL.
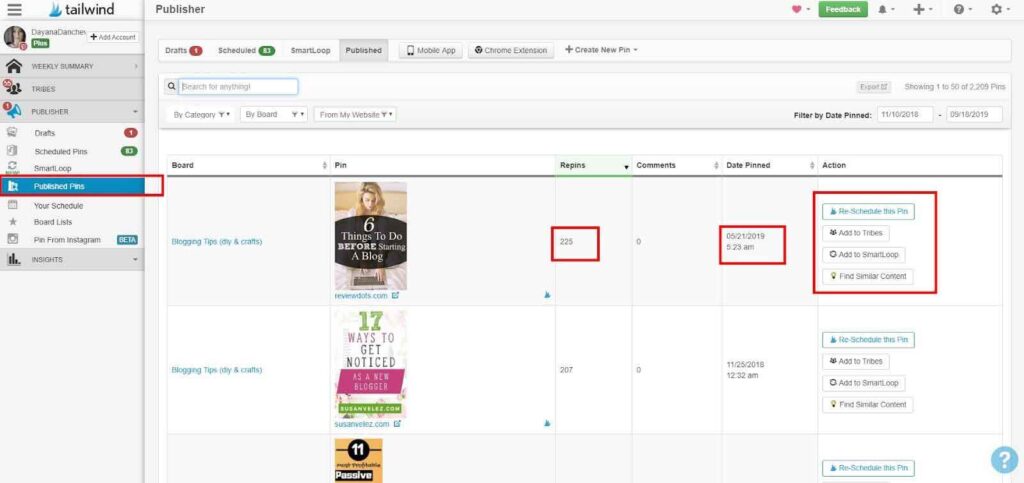
Tailwind allows you to keep track of your published content. You can see the number of repins you have received on each pin and the date when it was posted. You also have the option to reschedule the same pin, add it to Tribes, add it to Smartloop or find similar content if you have nothing else to share to your boards.
A very important step of your Tailwind journey is to select the best time slots for your account. You can find them under Publisher -> Your Schedule:
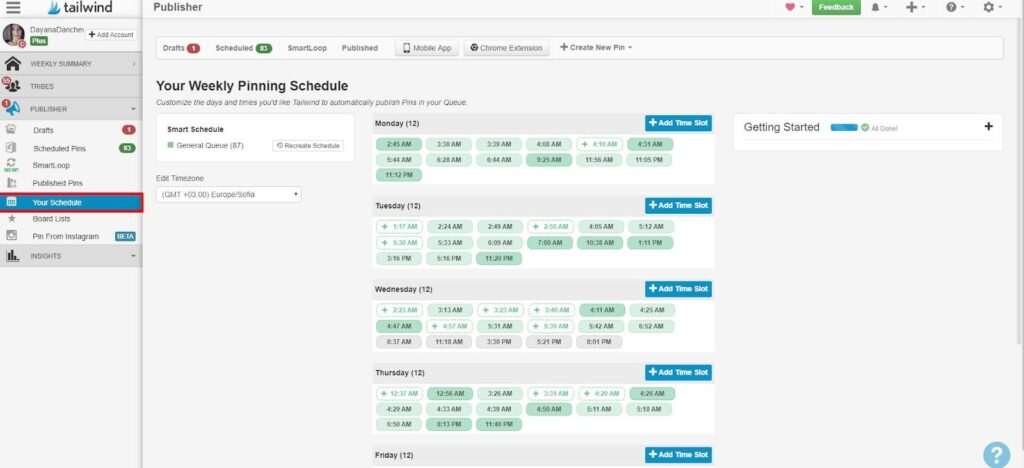
The number of pins you can schedule depends on your Tailwind plan. I have 400 pins for the month which to me as a blogger is completely enough. However, if you are a business and you want to share products, you might need a different plan that offers unlimited pins.
I focus on posting 10-12 times a day which you can see from the picture above. The time slots marked in green are suggested by Tailwind’s algorithm based on their Pinterest data.
The white colour indicates that the time slot is not added yet, but it is suggested by Tailwind. The grey colour indicates that you added the time slot to your schedule.
You can add time slots manually, but I would suggest that you use Tailwind’s algorithm for that. Start the process by clicking the Recreate Schedule, shown in the picture below:
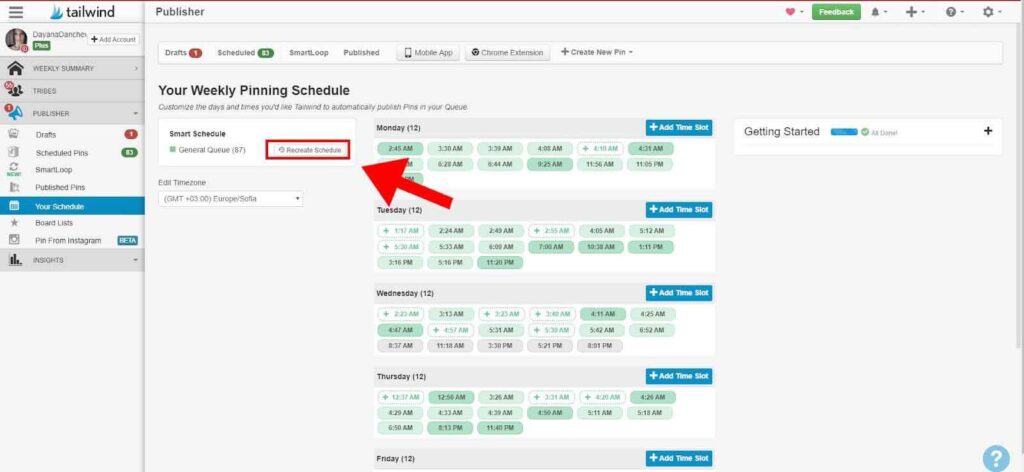
You will be asked to choose how often do you plan to pin, so select wisely.
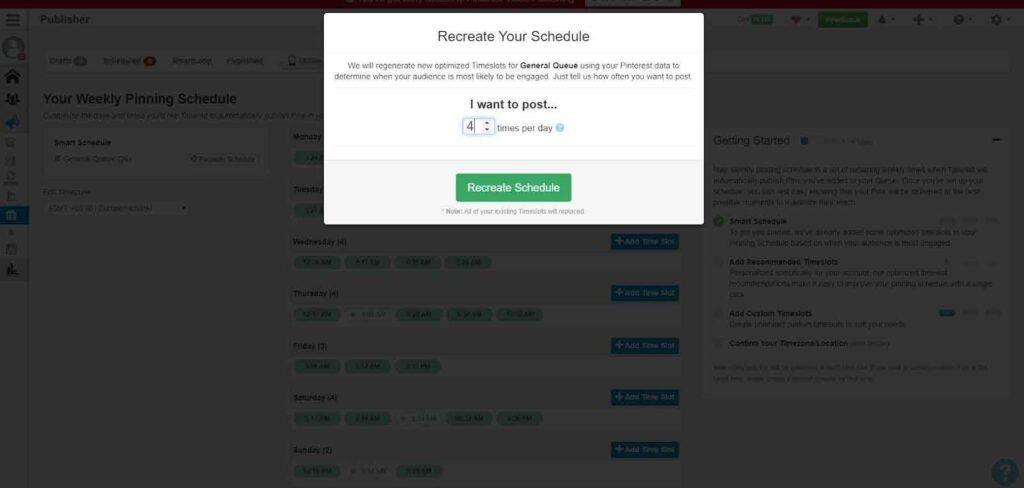
This will form your Tailwind schedule.
You can use Tailwind’s “Smart Schedule” option for the best results.
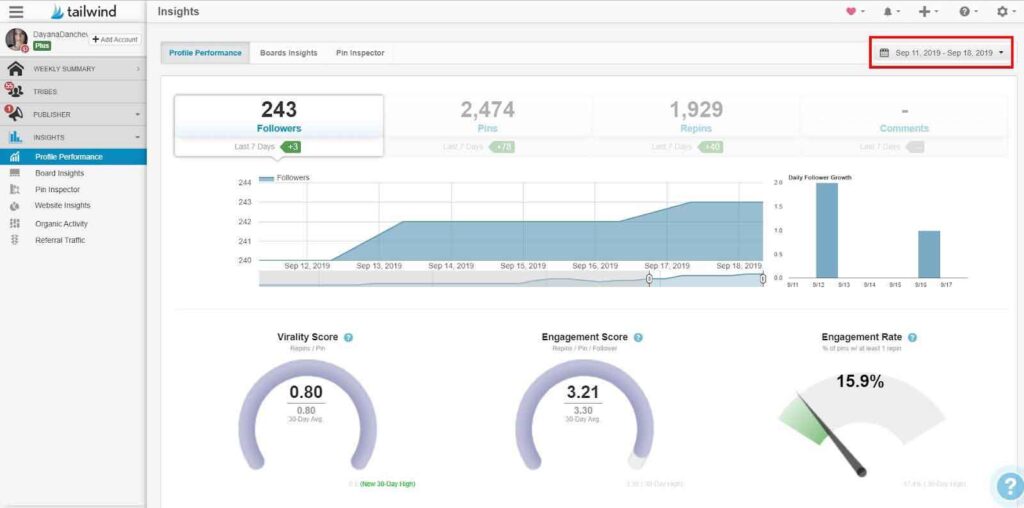
The last thing before I get into strategy is your Tailwind Insights. There, you can find detailed information about your Pinterest profile and website traffic. Here are the most important insights you need to keep track of are:
Profile Performance
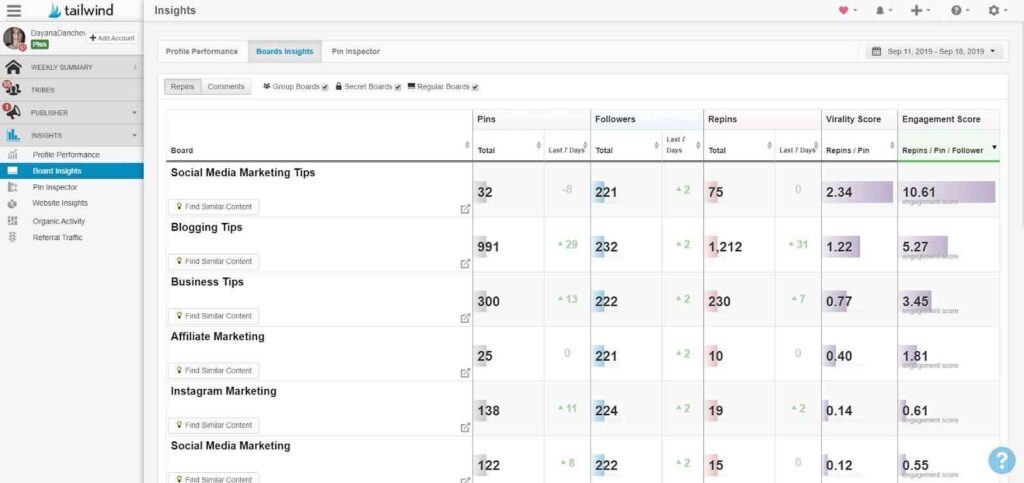
Board Insights
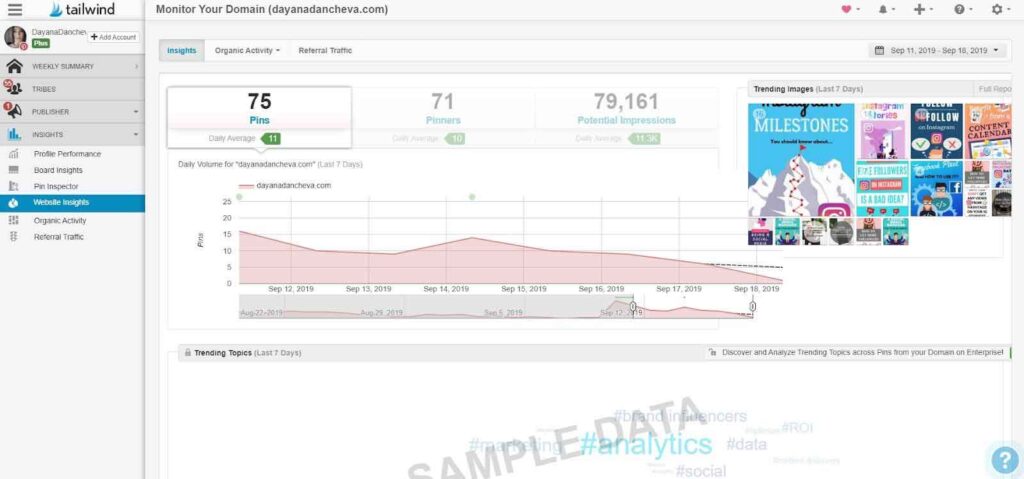
Website Insights
Happy pinning!
If you want to know more about Tailwind or Canva the graphic design software click on the relative icon below:
Disclosures:
Tailwind: We are a participant in the Tailwind Affiliates Program, an affiliate advertising program designed to provide a means for us to earn fees by linking to Tailwind.
Canva: We are a participant in the Canva Affiliates Program, an affiliate advertising program designed to provide a means for us to earn fees by linking to Canva.